Data Not Working on Your Android Phone? Check Your APN Settings

It never fails
Just when you’re completely and utterly dependent upon your Android phone, when you can’t call your kids or grandkids without it or find the closest HomeGoods or PGA Superstore unless Google Maps is ready and waiting, it gives up the ghost. Simply stops working. Just denies you the mobile data connection you need right then and there.
We’ve all been there and it’s insanely frustrating. But there are ways to determine what's wrong and correct it. Do you have a mobile data limit? If so, you might need to update it.
If that's not the trouble, to fix mobile data when it's on the fritz, check your APN settings on your Android phone, and get back in business quickly.
So, what does APN stand for?

APN stands for Access Point Name, and it refers to the carrier or network your cell phone uses to access or connect to the internet. Under regular circumstances, you don’t need to fiddle with it. It comes preconfigured by the manufacturer and works its magic behind the scenes.
Sometimes, though, things go wrong (like when Google Maps stops helping you get to HomeGoods!) and your APN needs to be reset. Here’s how you do so.
Reset your Access Point Name

These instructions are simple and easy to follow, and they should allow you to reset your Access Point Name quickly and easily.
Go to:
“Settings -> Network & internet -> Mobile networks -> Access Point Names.”
If you have an Android 11 or earlier, tap “Advanced” under “Mobile Networks” and you will see “Access Point Names.”
At this point you should see a list of Access Point Names (APNs). In the menu icon, on the top right, click “Reset to default.”
This should do the trick. But if it doesn’t, keep reading. We have other tips up our sleeve.
Additional ways to reset your Access Point Name

Sometimes after an Android software update, APN settings can go awry. If the above solution hasn’t fixed the issue you’ll need try one of the following methods.

Enter your APN address manually
-
Go to your APN list using the method outlined above, then tap the “+” icon in the top-right corner.
-
Enter all the APN details for your network. These should be available on your carrier’s website (AT&T, T-Mobile, Verizon, etc.).
-
Save the APN details you’ve just entered, then select them from the APN list on your phone.
Clear your cache

A good chunk of your phone’s memory is dedicated to what’s called a cache. This is where data for apps and various processes your phone runs is stored for easy, automatic access when called upon.
Sometimes though, errors occur in the cache and wreak havoc on your data connection. When this happens you need to clear the cache and to do that you need to access what’s called the recovery screen.
Accessing the recovery screen can vary a bit from phone to phone, but on a typical standard, stock Android device, you should be able to get there by doing the following:
-
Turn your phone off. Then, when you turn it back on, hold down the power and volume buttons until the little droid shows up on your screen.
-
Using the volume buttons, work your way to what’s called “Recovery Mode.” It’s possible you’ll get a message on your screen that says “No command.” If that happens, try holding different combinations of the volume and power buttons. One method that works – according to Android users we’ve spoken with – is to hold the volume button up and the power button at the same time.
-
Once you’ve reached the recovery screen, select “wipe cache partition” by navigating to it using the volume button, then select “wipe cache partition” by using the power button.
Wiping the cache in this manner should only take a couple of seconds.
When it’s done, turn the power off of your phone and then turn it back on.
Check your network

Android mobile data not working yet? If methods one and two haven’t helped yet, it’s possible that your data isn’t working because your phone is set to access mobile networks – 3G or 4G – that are not providing the best coverage.

Do you have a 4G phone? If so, be sure 4G is selected as your network. And if you don’t have a 4G phone, it’s possible your phone is trying to connect to a 4G network. That won’t work as the phone isn’t capable of it so you need to check your mobile network settings.
That’s easy.
Go to your Settings app, then choose the "Mobile Data" section. Select Network Mode and then navigate to the network that works best with your phone. If your phone is 4G, set it to 3G/4G Auto. This way it will always seek out and connect to the best possible signal.
Return to your device’s default settings
We all love our various apps, but often they – as well as system updates – cause errors that interrupt data usage and result in our data not working. When this happens, it’s sometimes best to simply restore all your network settings to their default status. Here’s how to do this:
1.Go to “Settings -> Network & Internet -> Network settings reset.”
2.Click “Reset Network Settings.” You’ll be asked to confirm the selection, so click “Reset Settings” again.
3. Power down your phone, wait a few seconds, and then restart it.
Remember that when your return your device to its default settings, you will have to reenter your Wi-Fi passwords and pair your Bluetooth devices again.
It’s a little bit of a hassle but a small price to pay for having your mobile data up and running again!
Pop out and switch out your SIM card
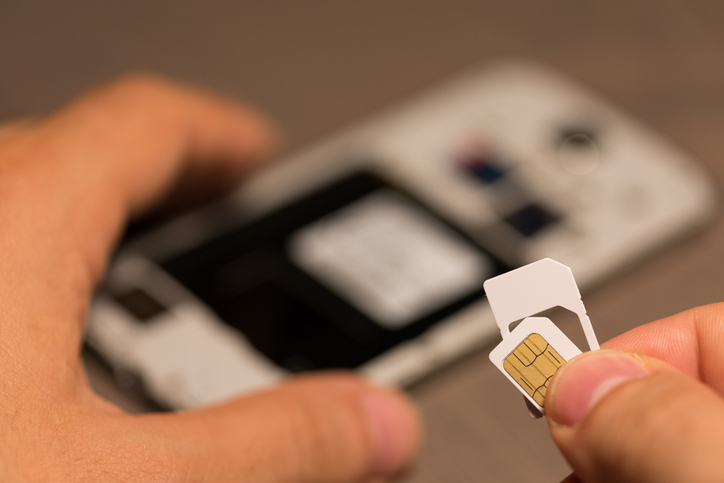
If you’re still having data issues with your cell phone, try switching out the SIM card. Don’t worry, it’s easy.
Simply borrow a SIM card from a family member or friend whose service is provided by a carrier different from yours. Then test it out in this manner:
-
Shut down your phone.
-
Remove it from the case, if it’s in one, and then remove your SIM card. The SIM card will most likely be located on the right or left side of your device. You can pop it out using what’s called a SIM ejector tool or – why give yourself a headache? – a paper clip. Press the clip into the small hole on the SIM tray panel and it will pop open.
-
Next, remove your SIM card and put in the one you borrowed. Close the SIM tray.
-
Now, turn your phone back on.
Now that your data is working, get FREE wireless with Life Wireless
Now that your data connection has been restored (and you no longer feel like tossing your phone out a window out of frustration!), discover the freedom of FREE wireless service with Life Wireless.
It sounds too good to be true, but it’s 100% real.

Life Wireless offers government subsidized cellular services through the Affordable Connectivity Program to qualifying individuals and families. And, if you’re unemployed or participate in a government benefit program such as SNAP, Medicaid, Federal Public Housing Assistance, SSI, or WIC, you already qualify for this Federally funded free cellular service. As a participant, you receive the following, free, each month: Unlimited talk, text and data, and a free smartphone or you can bring your own.
Even if you’re paying just $20 a month for cell service, wouldn’t you rather have that $240 to spend on groceries, gas, or paying down debts? Of course you would. All it takes is just a few minutes to complete the application. Do so now, and you could be cutting your monthly cell phone bill to nothing in no time.
Plus, if you’re approved for Life Wireless/Lifeline Assistance Program and sign up for the Affordable Connectivity Program (ACP), you get two sources of free talk, text, and unlimited data that you can split between two phones. That means free cell service for you and free cell service for someone you love. If your child has been asking for a cell phone, this is a terrific opportunity to provide him or her with talk, text, unlimited data and the ability to stay in touch with you!
Of course you don’t have to split the service between two phones, you can keep it all on one. But it’s a wonderful option if your spouse, child or relative needs a phone – and who doesn’t? – but has been unable to get one due to the expense.
Whichever option you choose – to keep the data on one phone or split it between two – Life Wireless will make sure you receive the free talk, text, and unlimited data to help you stay connected.
Option 1: Combine Your Data
Activate Lifeline and ACP on the same device and receive unlimited talk, text, and data, plus 5GB of mobile hotspot.
Option 2: Split Your Data
Split your data between two phones or supported devices and you’ll have one device with ACP’s free talk, text, and 6GB of data and a second device with Lifeline’s talk, text, and 4.5GB of data (6GB of data in California).
Fast facts about Life Wireless

Yes, you can add more minutes and data!
You can purchase additional minutes or data one of the following ways:
- Go to www.LifeWireless.com and click "Add Minutes/Data"
- If you have a smart phone, go to your MyLifeWireless app and click "Add Minutes".
- Call Customer Service at 1-888-543-3620, or by dialing 611 on your Life Wireless phone.
- You can also go to any Moneygram location and use Receive Code: 7924
Yes, you can track your minutes!
Your minutes replenish each month on your anniversary date before end of the day. For example if you signed up and received your minutes on the 12th of the month, your minutes will replenish every month on the 12th of the month.
You can check your account balance the following ways:
- Go to www.LifeWireless.com and click "My Account"
- Go to your MyLifeWireless app on your phone, and click "Check Balance"
- Call Customer Service at 1-888-543-3620, or by dialing 611 on your Life Wireless phone.
Yes, you can keep your current phone number!
If your application is approved, you have the option to keep your current phone number.
Once you receive your Life Wireless phone in the mail, call Life Wireless Customer Service at 1-888-543-3620 and a representative will assist you in keeping your current number. Make sure that you don't call from your Lifeline phone and have your account number and password from your previous carrier handy.
Don’t wait. Get FREE wireless service now!
Posted 1 year ago